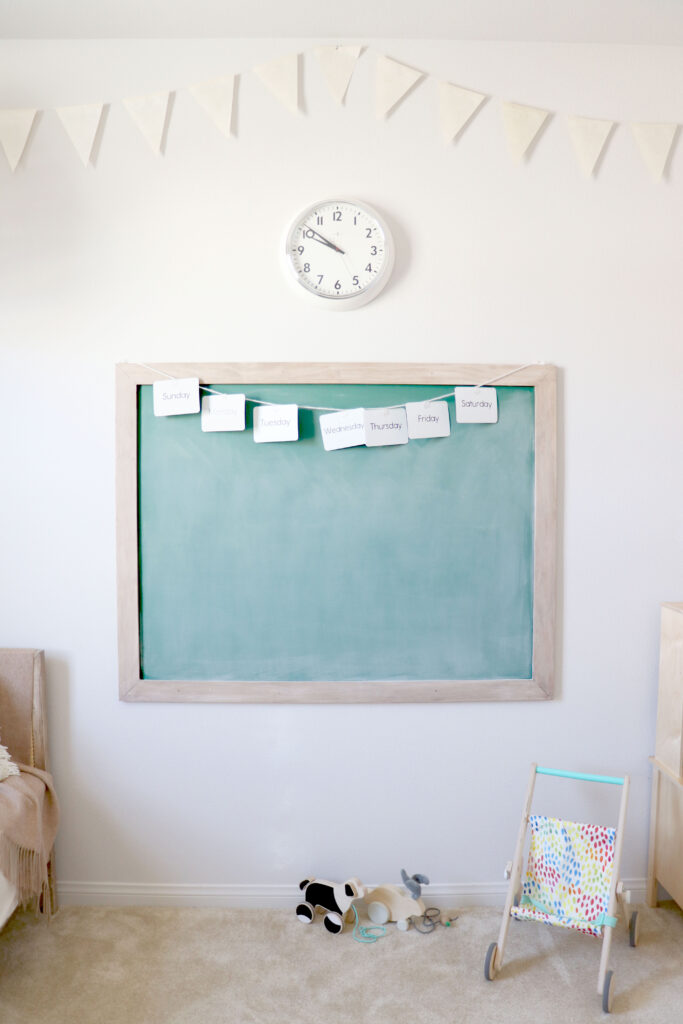
How To Make A Large DIY Framed Chalkboard
Hi Friends! We recently made this large DIY framed chalkboard for our playroom / home learning room and it turned out so great!! I wanted to shared a tutorial in case anyone wants to make one too!
Beyond just being super cute, chalkboards help with physical development such as:
- Shoulder and elbow stability
- Ability to cross the body’s midline
- Wrist extension and pencil grasp
- Visual focus and hand-eye coordination
- Spatial awareness
- Core and back muscle strength and posture
My daughter loves to draw pictures and practice writing her letters on this chalkboard and if you have a little one who doesn’t like to sit still… being able to stand and move around while writing and drawing is a fun way to learn! So here is the tutorial!!
HOW TO MAKE A DIY LARGE FRAMED CHALKBOARD:
What You’ll Need:
- One quart of this chalkboard paint and then color match a Sherwin Williams color, kendal green
- Two quarts of this craft stain in pickling white and special walnut, for the frame
- We love ECOS Paints because they are made with non-toxic paints and stains free of VOCs and harsh odors.
- One 4 foot by 4 foot piece of ¼ inch plywood
- Two 6 foot long 1 by 3 boards
- Screws
- Paint Roller
- Foam Rollers
- Paint Tray
- Paint brush
- Drill / Driver
- Miter Saw
- Oscillating Saw
- Wood Glue
- Painters Tape
- Corner Clamps
- Chalk & Eraser
The Build:
First step was to cut one foot off the plywood, we wanted a rectangular shape and 4′ x 3′ fit our space just right.
Next I cut a notch from the edge of the 1′ x 3′ boards, I did this with a handheld oscillating saw, but it would have been much easier with a table saw. You could also skip this step and just glue the frame to the top of the plywood. After notching the boards, I cut them to the correct length with 45 degree angles at the ends. Finally I added a touch of wood glue, clamped the frame pieces in place and screwed it all together.
After the glue dried, I sanded and cleaned the frame to prepare for staining. The stain process we did was two steps, first we did a light coat of the Pickling White craft stain. After the first coat of stain dried, we topped with a coat of the special walnut craft stain.
While the frame dried, I painted the plywood with the ECOS Paints chalkboard paint; I did a thick single coat with a foam roller and it worked great!
After everything fully dried overnight we glued the painted plywood to the frame. We used a little painters tape to hold the plywood to the frame, and flipped the project over so we could stack weight on it as it dried.
Finally we attached the chalkboard to the wall and seasoned the board with a coat of chalk dust.
For some visual guidance, watch our video for this project below!
That’s It!
If you make this chalkboard or your own this chalkboard as inspiration, we would LOVE to see! Tag us on Instagram @HealthyGroceryGirl!
xx Megan & Aaron