DIY Coastal Farmhouse Playhouse
Hey Guys! Aaron, Megan’s husband here… welcome back to the Blog for a rundown of my latest DIY project… A coastal farmhouse playhouse!
DIY Coastal Farmhouse Playhouse Plans
When I share these DIY projects I often get asked if I have plans that I can also share. Unfortunately I do not, because I mostly make it up as I go, which is what I enjoy about carpentry and DIY projects. I like to create an initial design and then tweak and problem solve as I build. However, just like I did with our very popular fireplace project I am writing this blog post to share as much as I can about this project from dimensions to the supplies that I used, in hopes it’s helpful if you’re looking to build something similar. I also tried to capture helpful video shots as I built the playhouse and share those in the video below. So let’s get started!
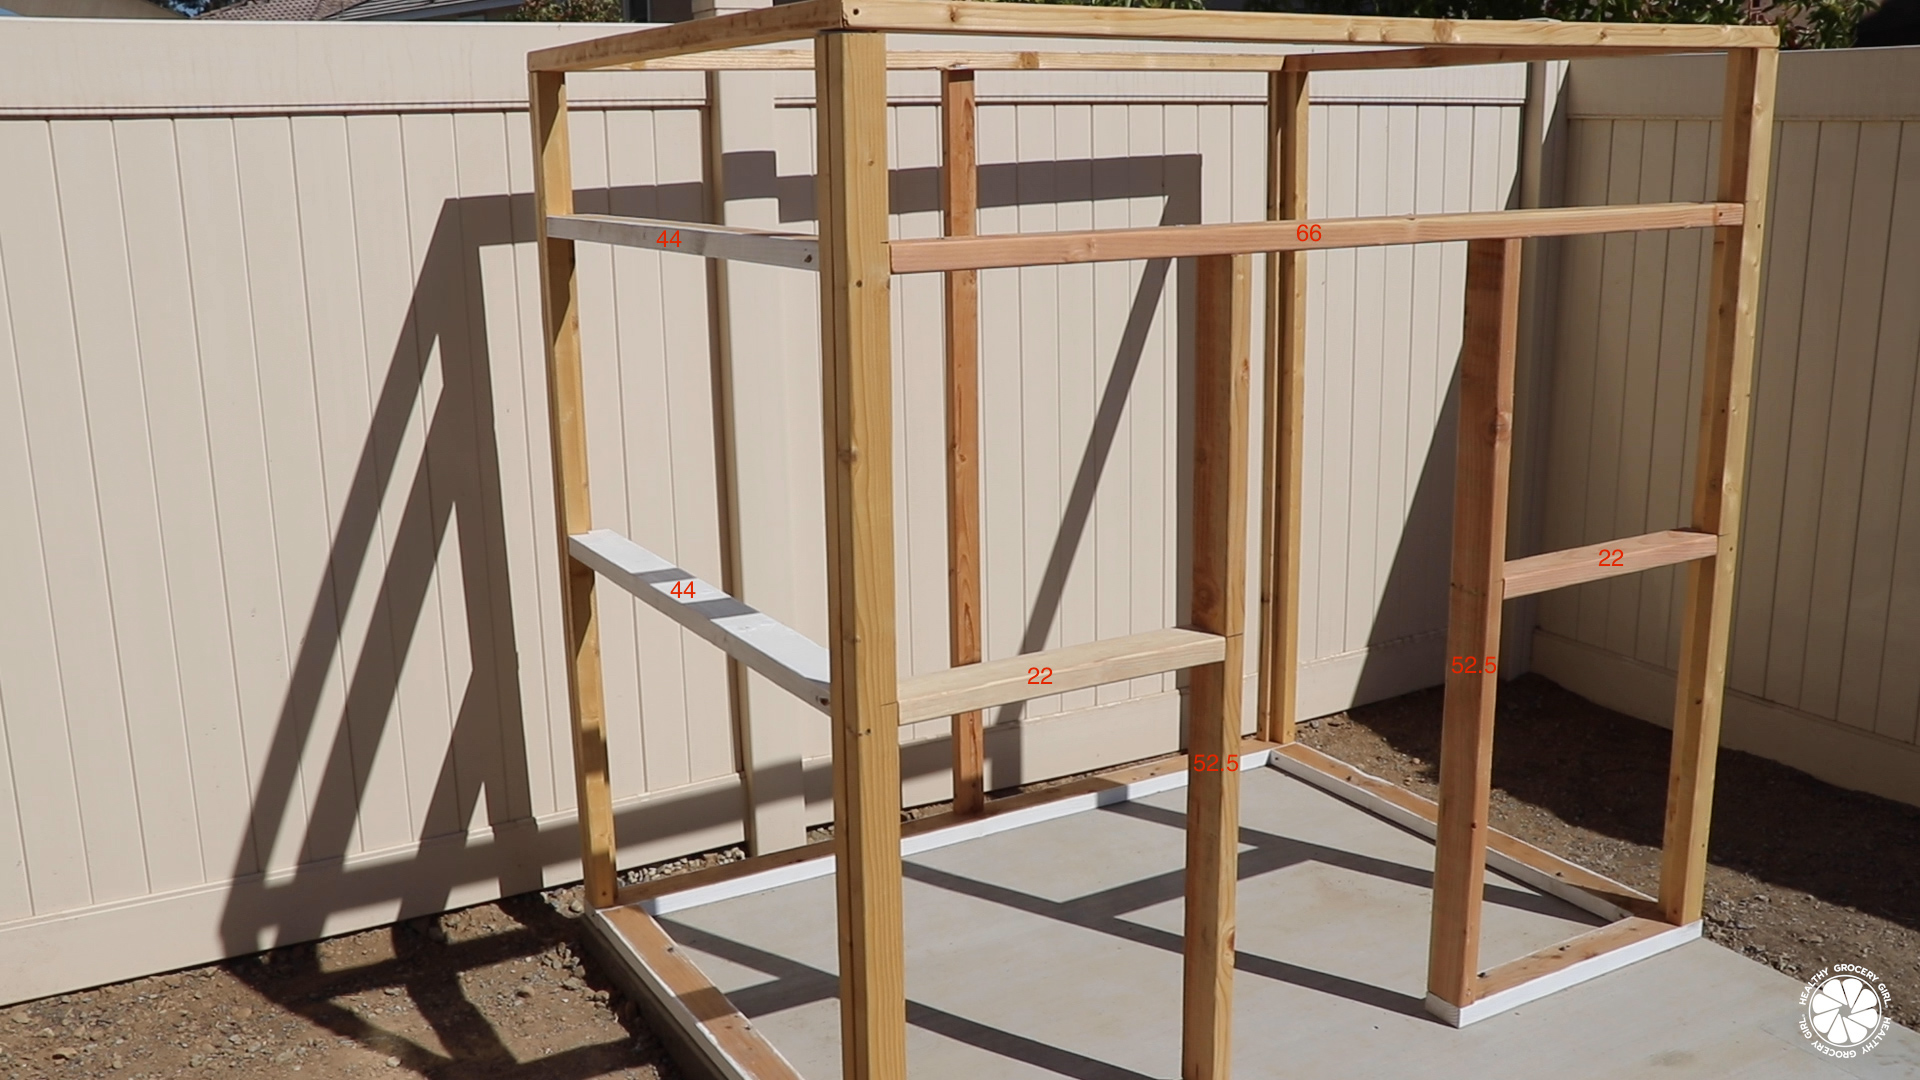
Kids DIY Playhouse Foundation
My original concept was a small playhouse 6 feet wide and 4 feet deep with a 2 foot porch, a slanted roof and an awning. I mostly followed my original design but along the way made some changes, the biggest change was going from a slanted roof to a peaked roof.
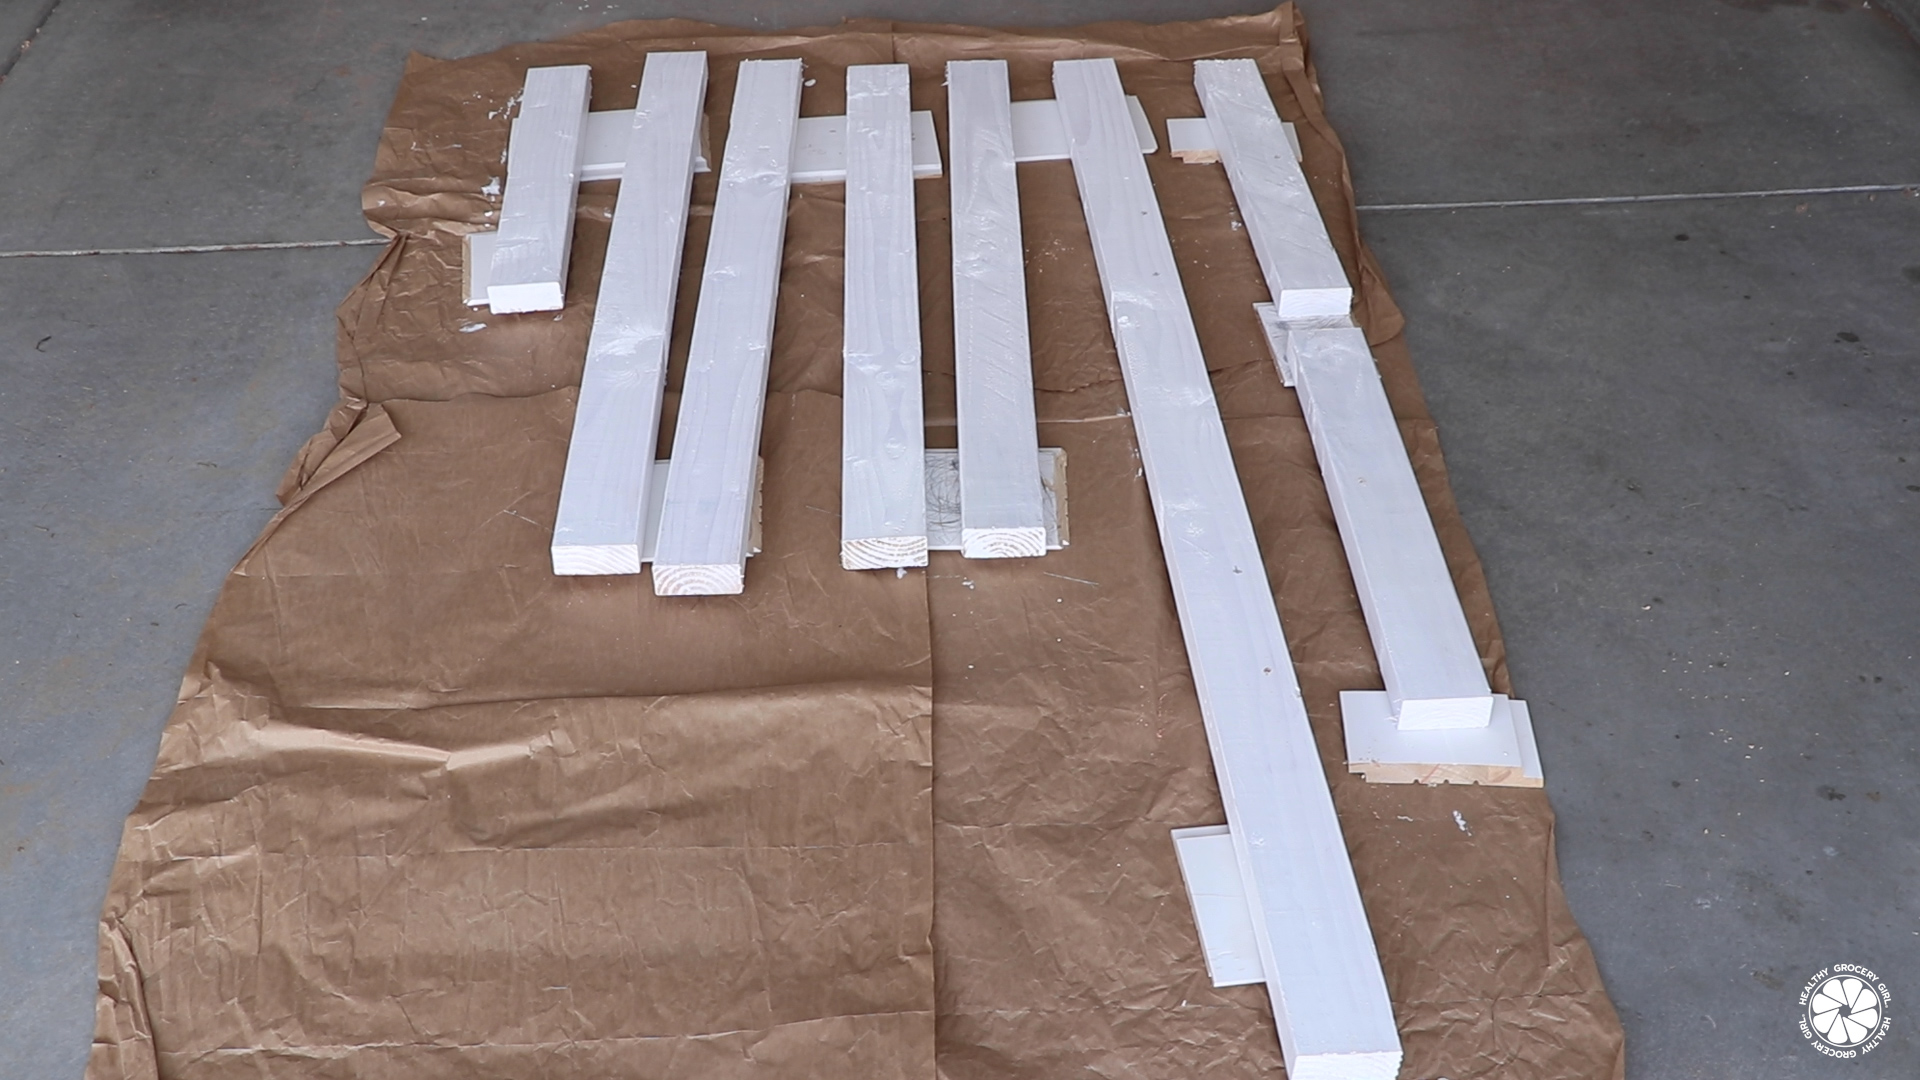
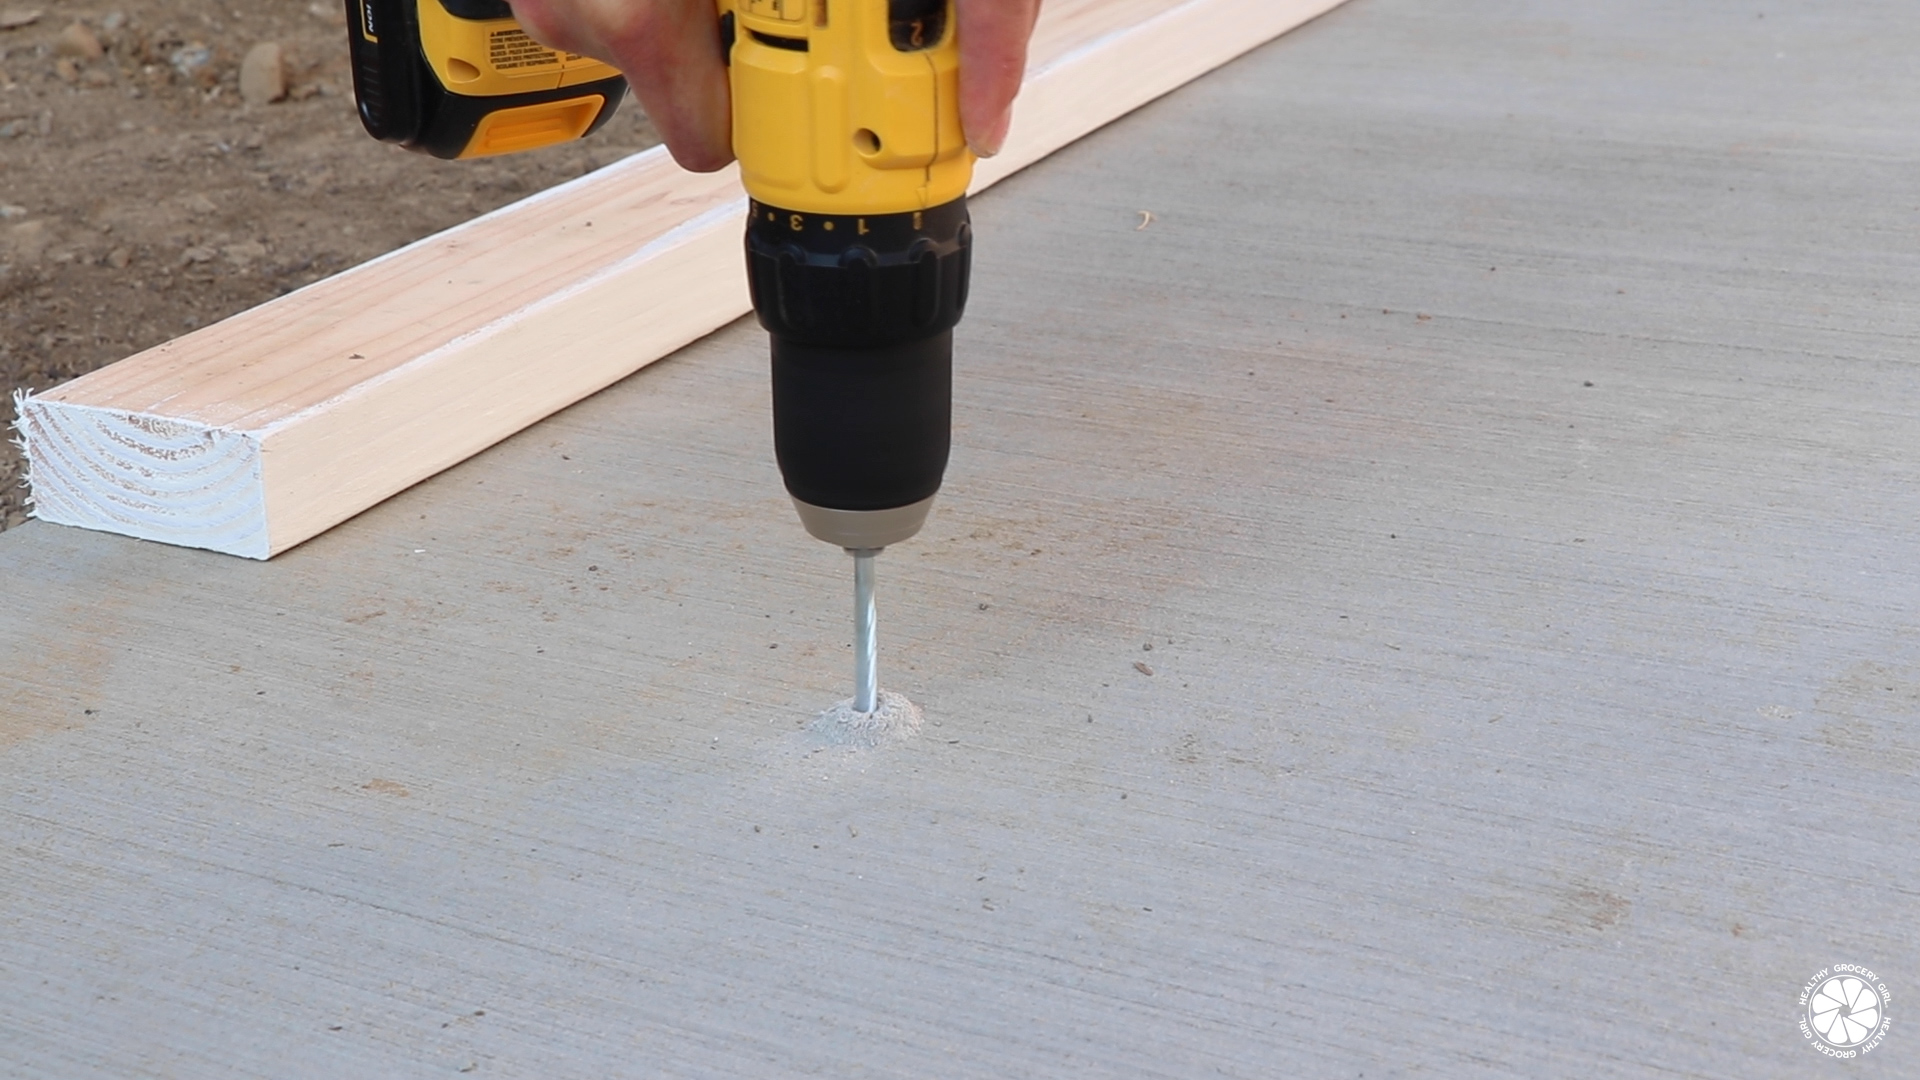
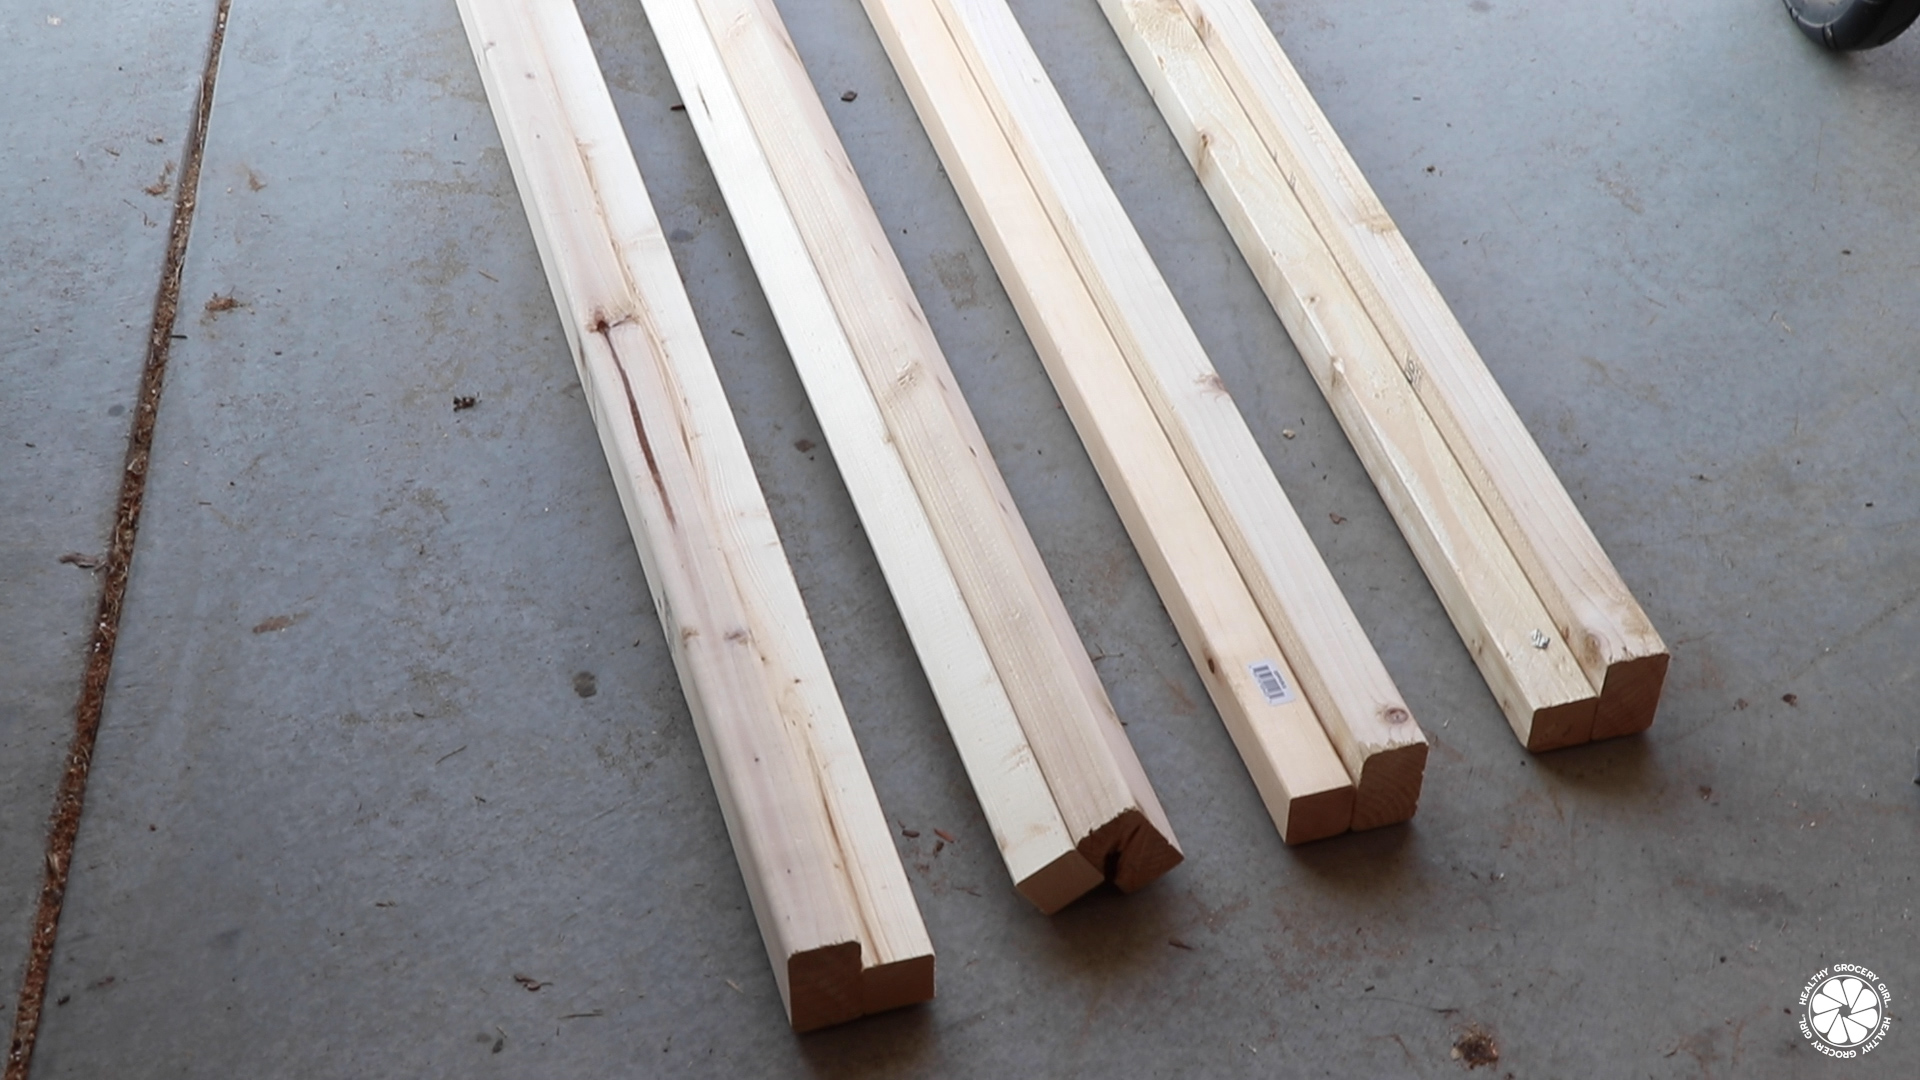
Step one, I needed a base. I originally planned a wood deck structure on the ground, but was concerned about bugs and critters living underneath and weather rot. In addition, the cost of wood was very high at the time I built this; so I decided to do a 6×6 concrete pad instead. I used all basic framing lumber for this project, starting with 2x4s as the base. I painted 3 sides of the lumber with multiple coats of high quality outdoor paint. Then I used a concrete drill bit to drill pilot holes and attached the sill plates to the pad. I’ve listed all the supplies I used for this project at the bottom of this blog post if you’re wondering what type of wood, paint and supplies I used.

Kids DIY Playhouse Framing
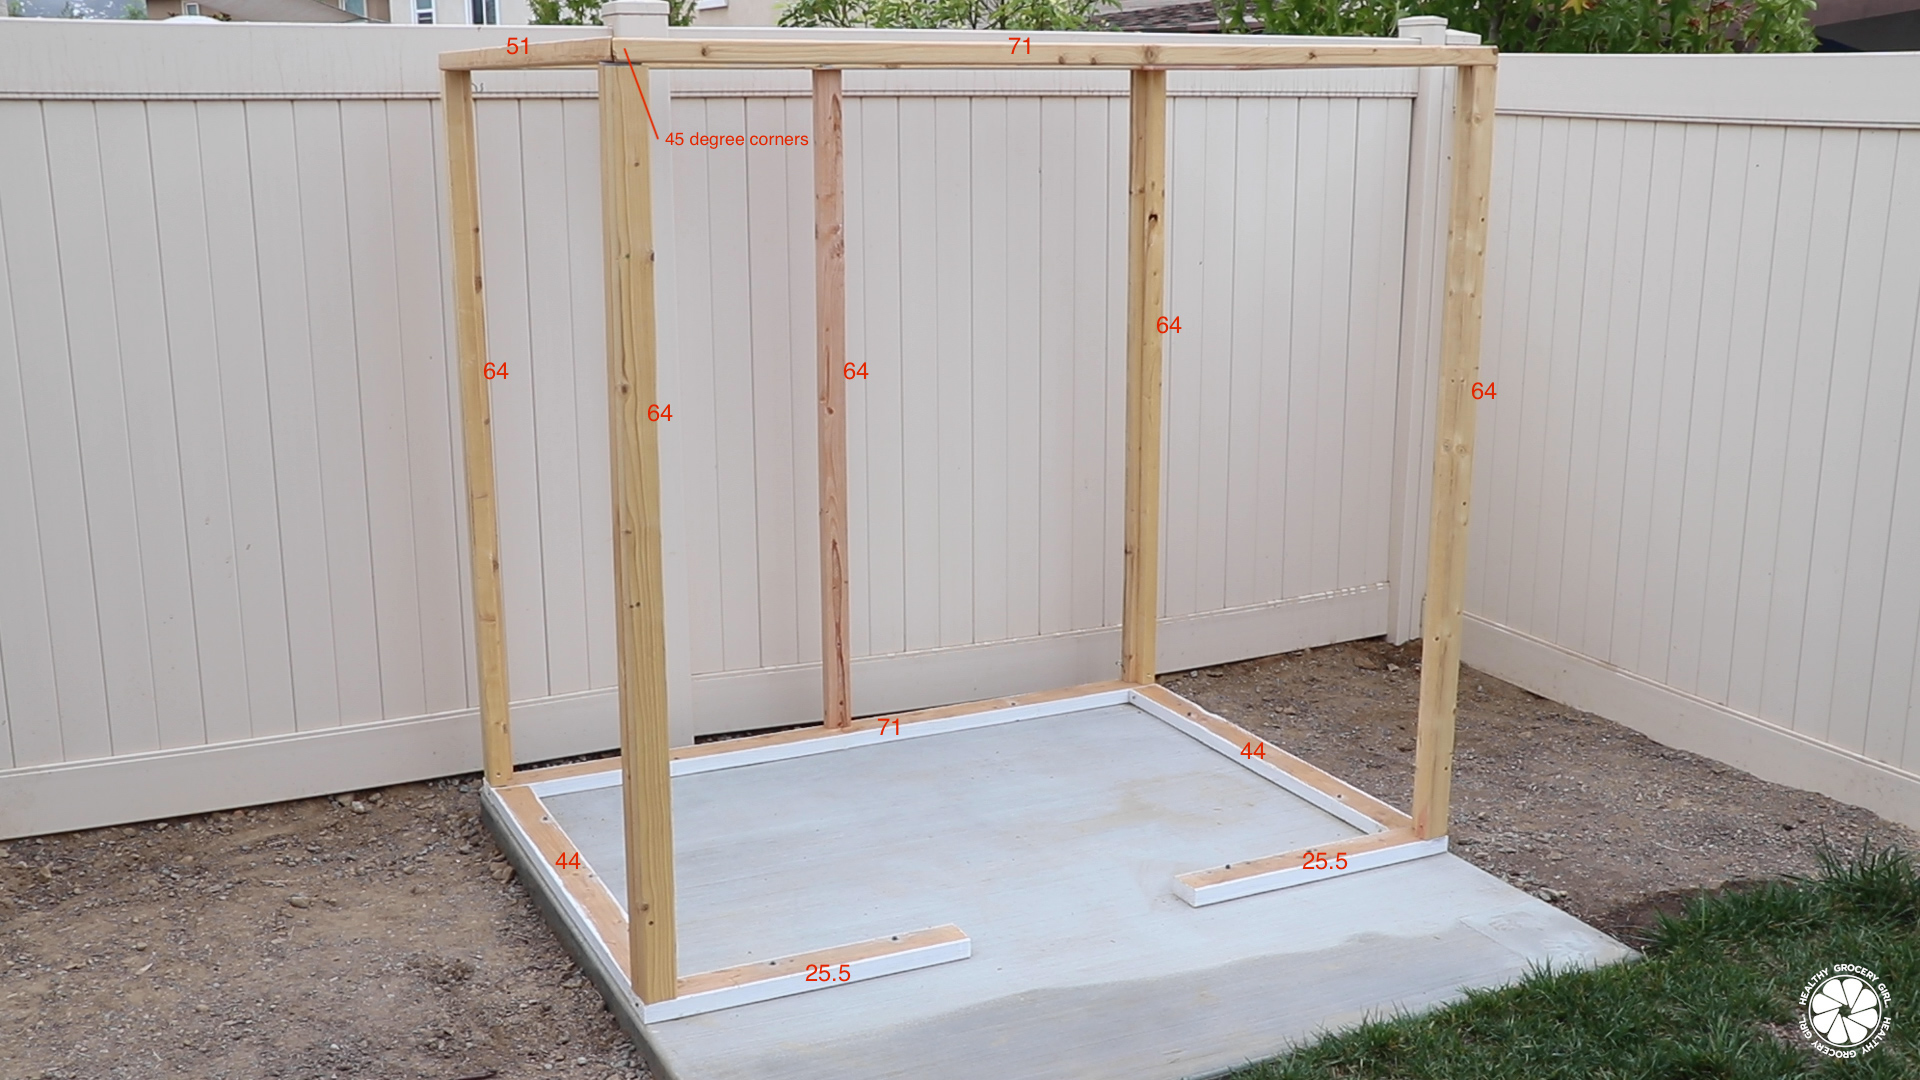
Next, I constructed the corners. For this I used 2×3’s and 2×2’s screwed together. I did this to create the look of a post at each corner, but the V shape it creates gives me the ability to attach plywood to the inside edge. I attached the corners and 2×3’s for the top plates to create the basic structure, as you can see I also added a vertical 2×4 in the center of the back wall. I did this because the back wall is just plywood so it needed some more support and the 2×4 helped to hold this initial structure in place, keeping it from flexing out of alignment. At this point, without the plywood up, the whole thing is a little wobbly.
I also took the opportunity to make sure the framing was as true as possible, meaning the walls were straight and everything was level. In one of the front corners I inserted two little metal plates to lift up and level the top plate. This was necessary for my build because the concrete pad is just ever so slightly tilting to one corner. I tilted the pad on purpose to guarantee that any rain or water from the sprinklers would run off and not back into the playhouse. Lastly I used 2×4’s to create the door and window frames.
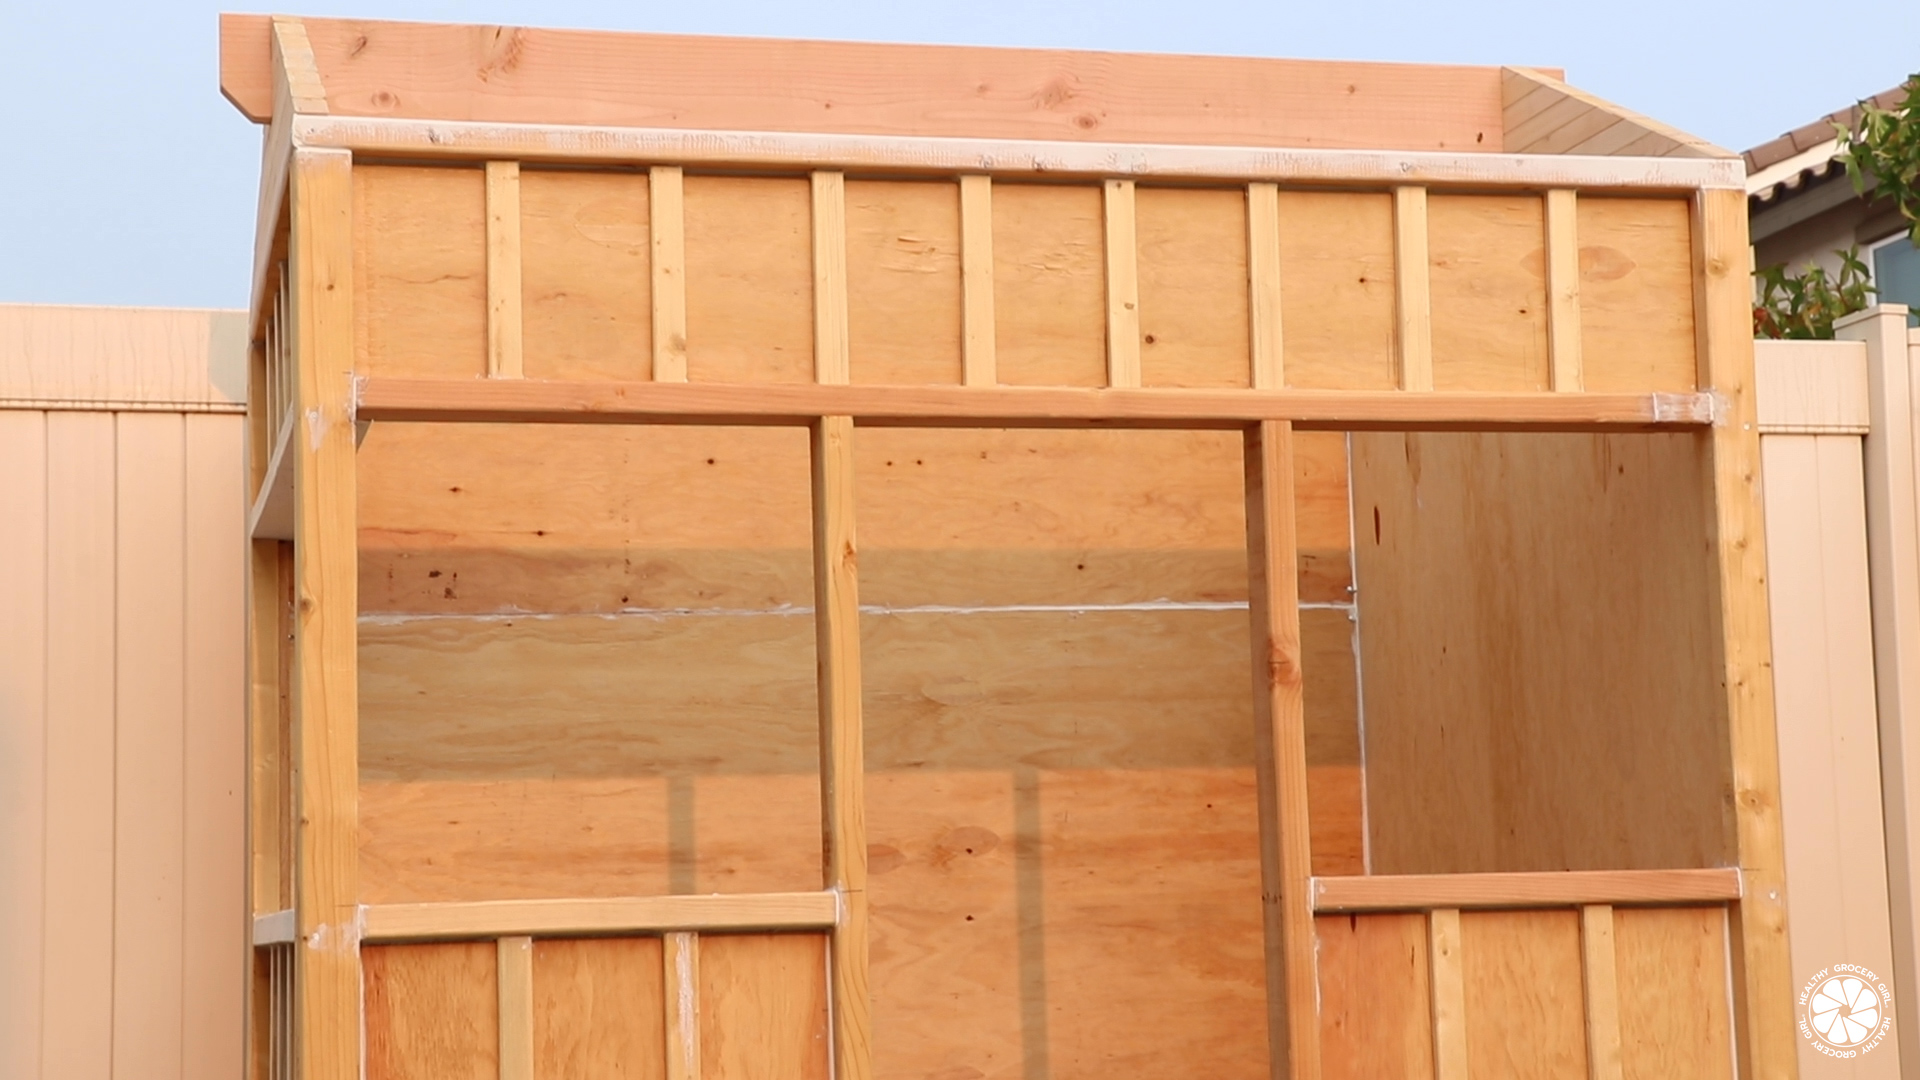
The Farmhouse Look: Board & Batten
For the walls I used 4×8 sheets of 1/4 inch plywood, which was relatively inexpensive and easy to work with. If I did this again, I would probably step it up to 3/8 inch ply for a even sturdier build. I carefully measured and cut each piece and adding the plywood is where the house really became solid.
Next step was to install the battens, to give the house a board and batten look. It took a long time of measuring and tweaking to decide on how much space to have between each batten. I have about 6 and ¾ inches, but honestly the spacing is not truly uniform throughout. I moved them around so it looks pleasing to the eye, the measurements are far from exact on this project. The battens are glued to the plywood, and then screwed on from the inside. In a few places there are screws through the framing, into the ends of the battens to help secure everything in place. Then finally, my best friend… caulking!
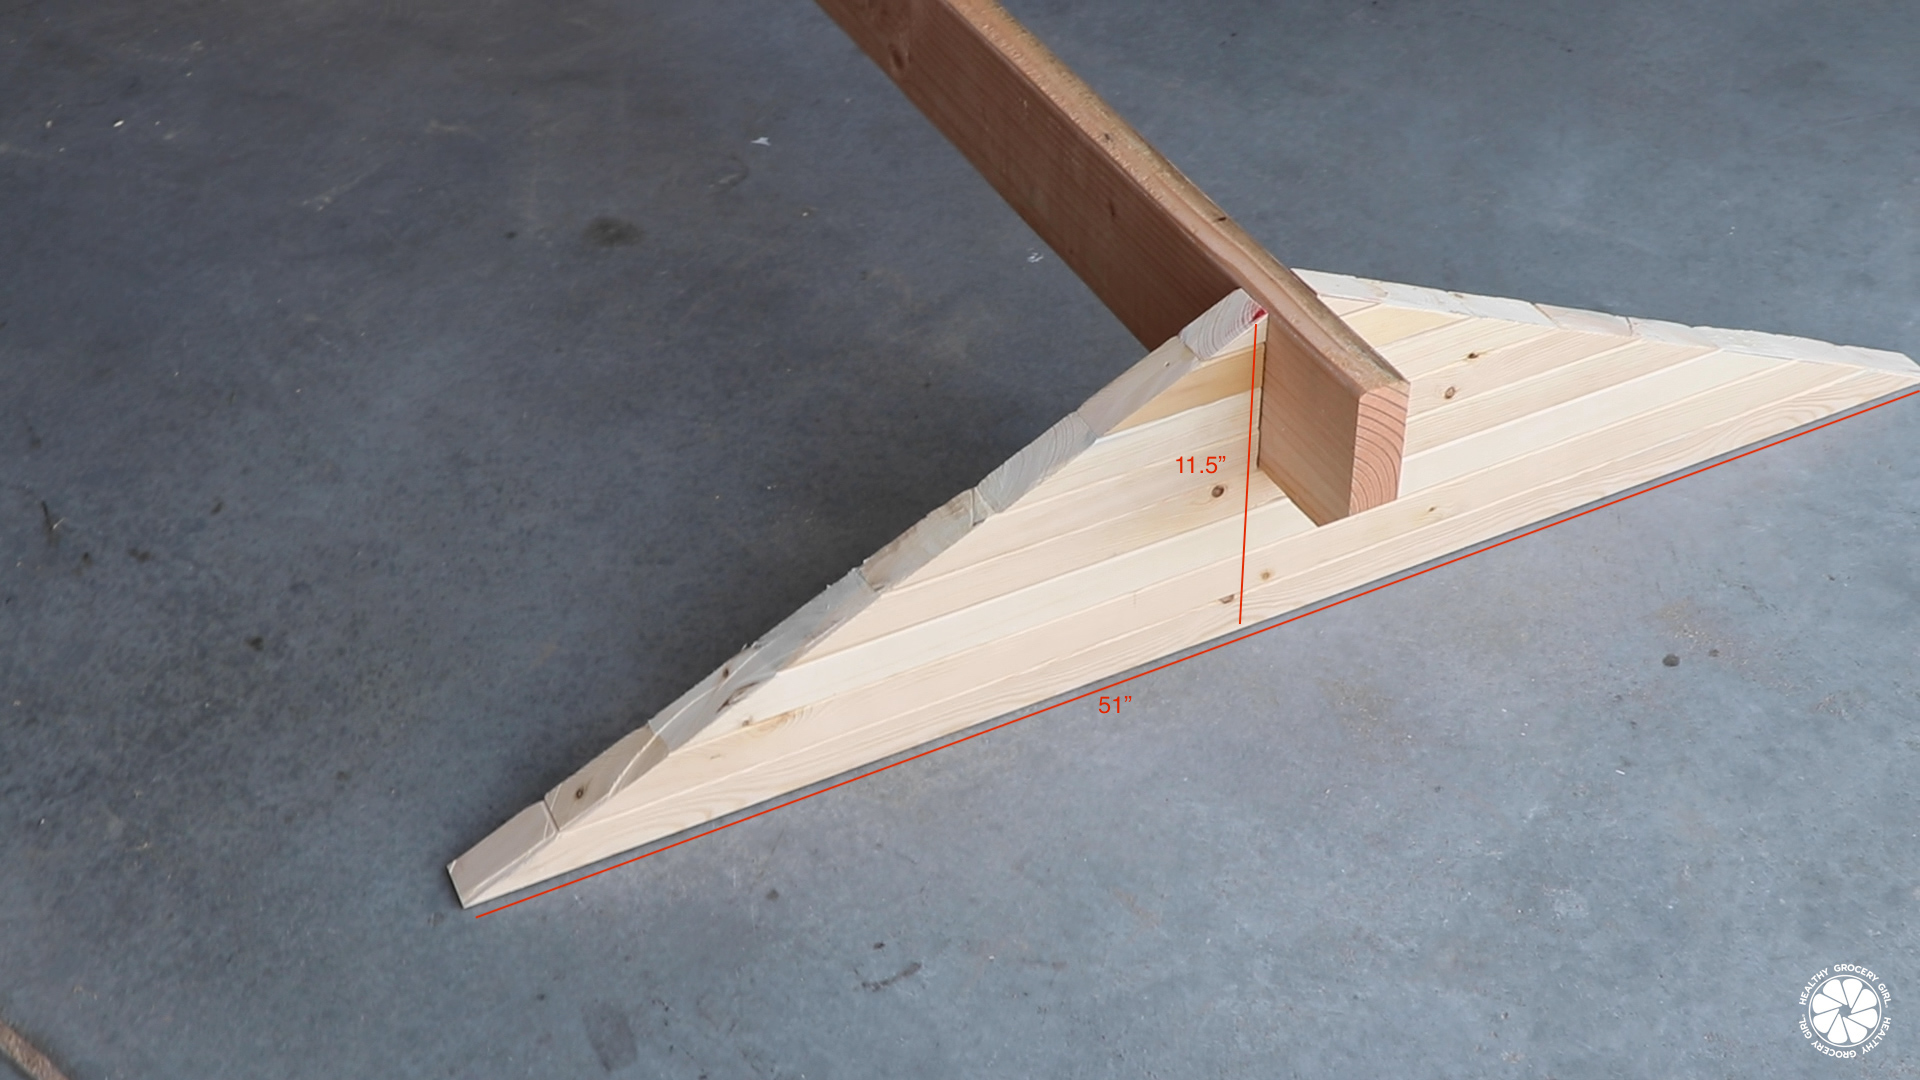
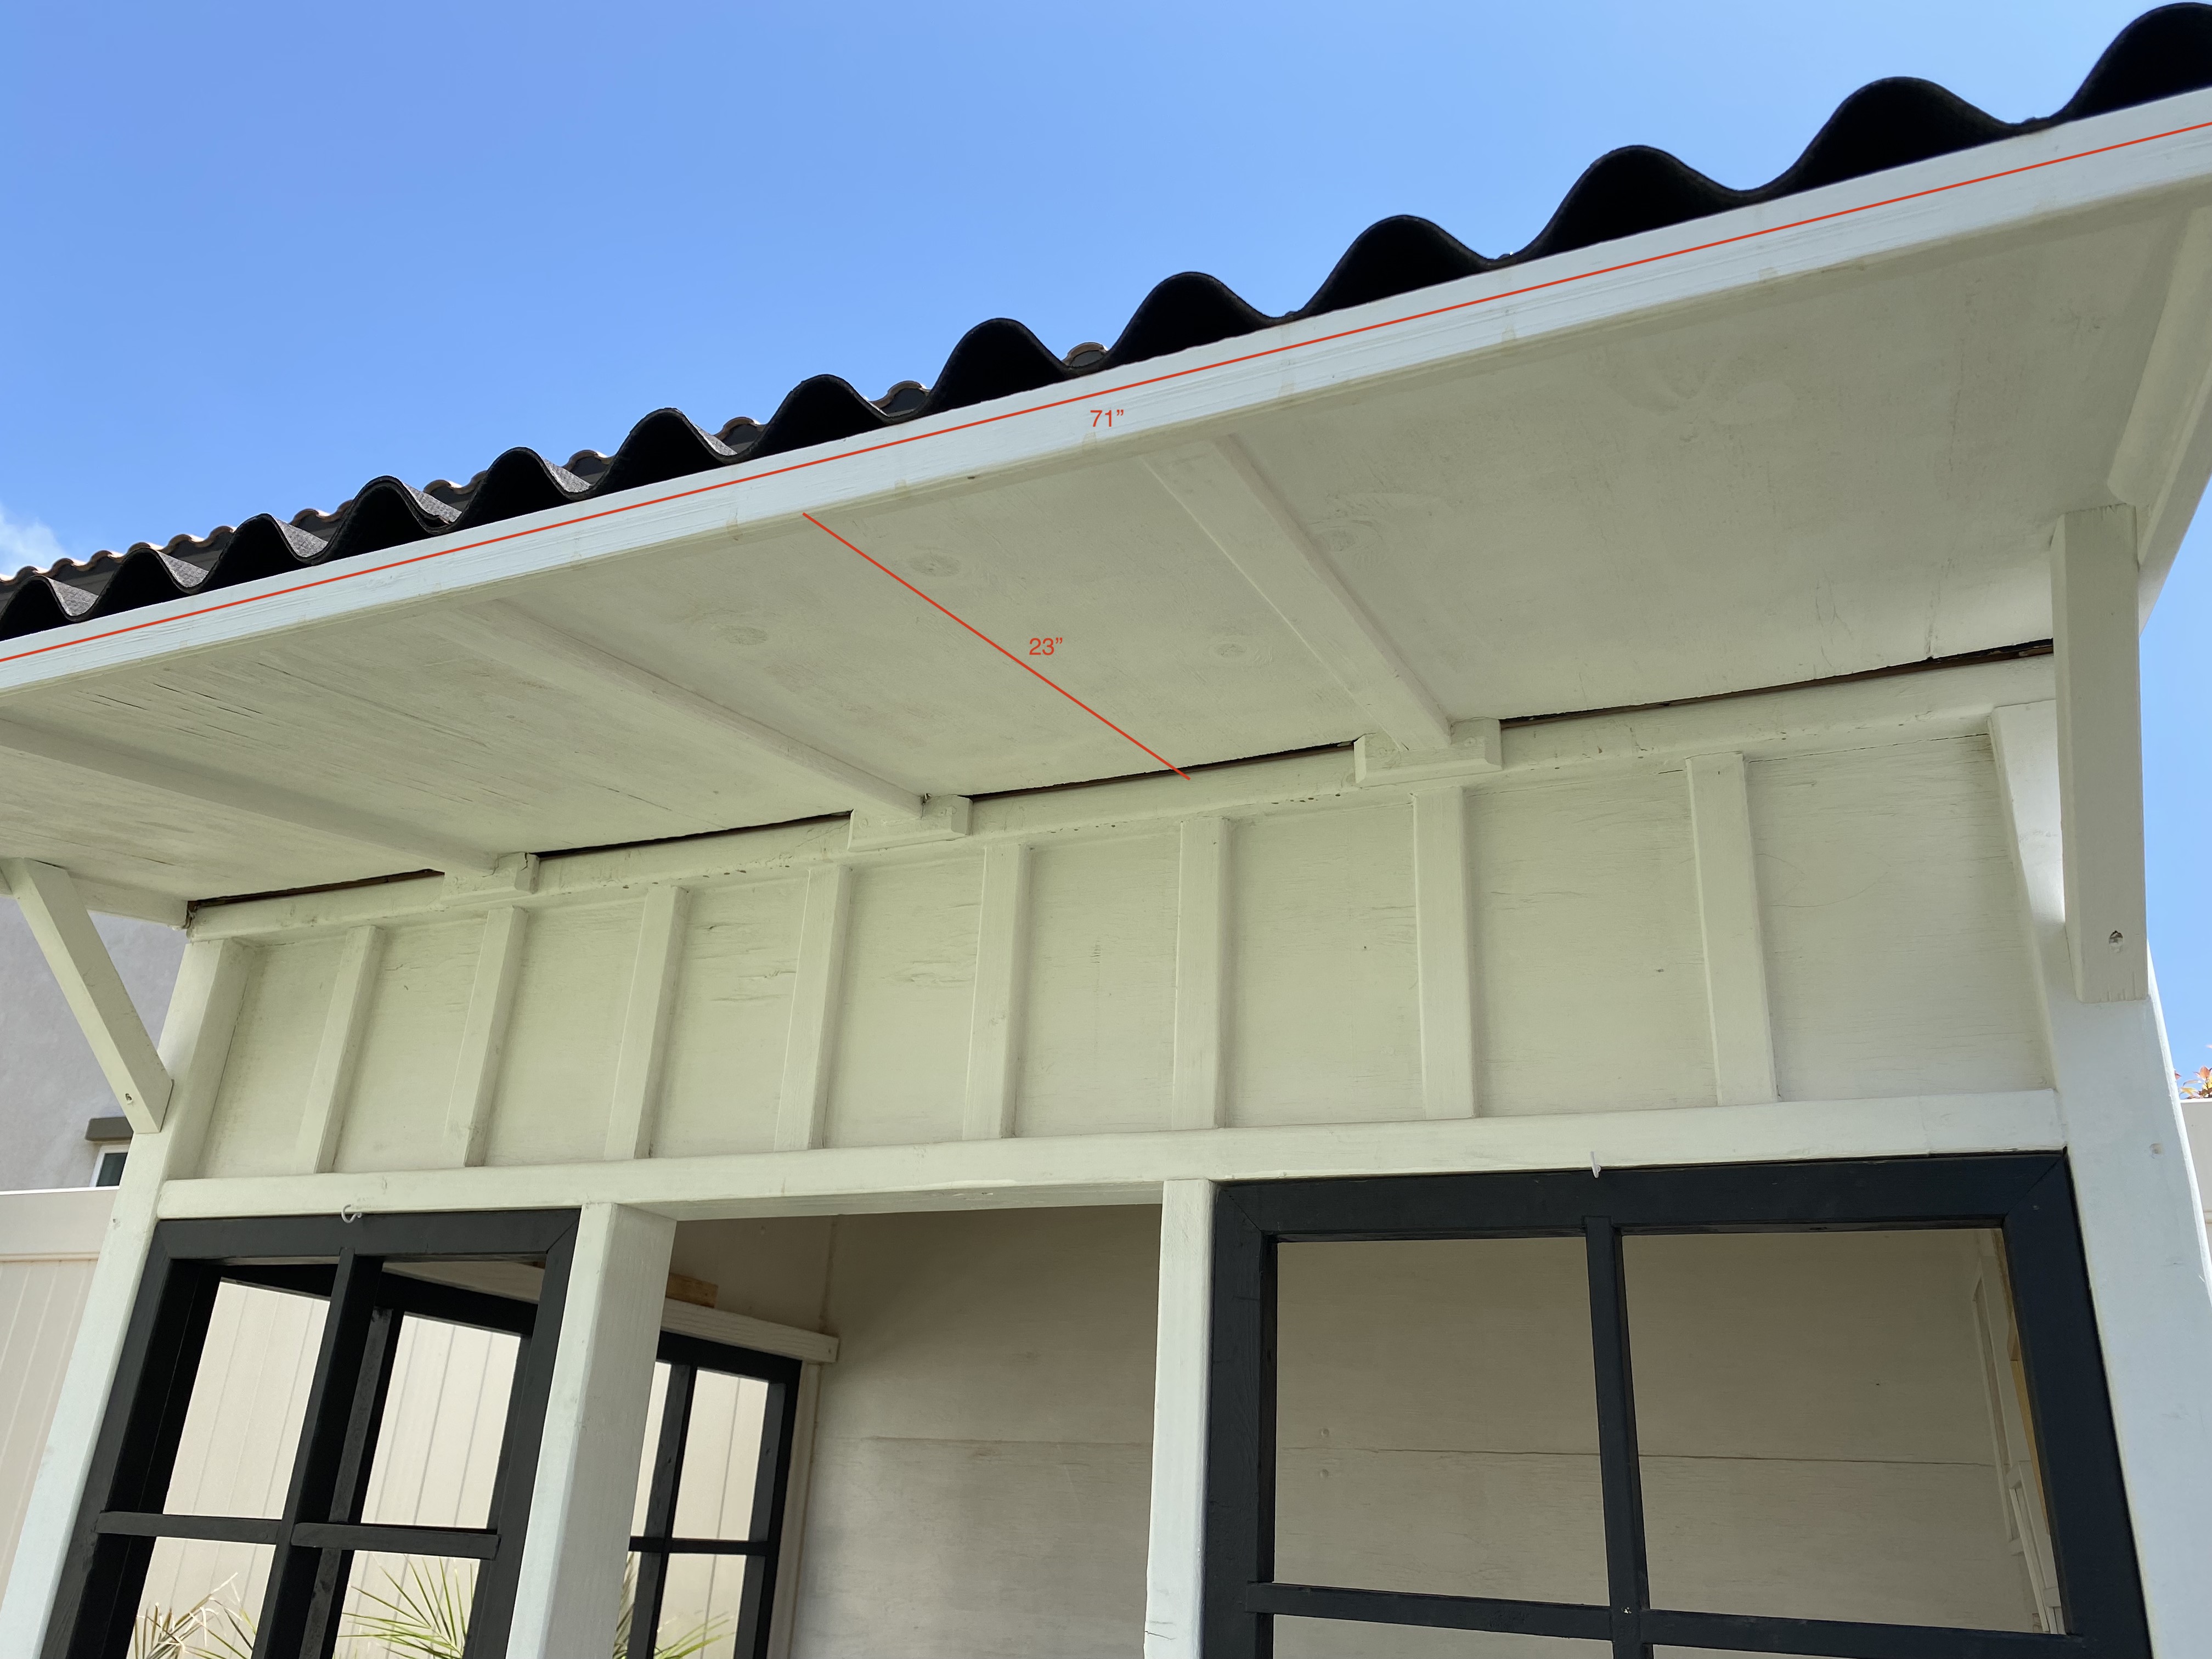
Raise the Roof!
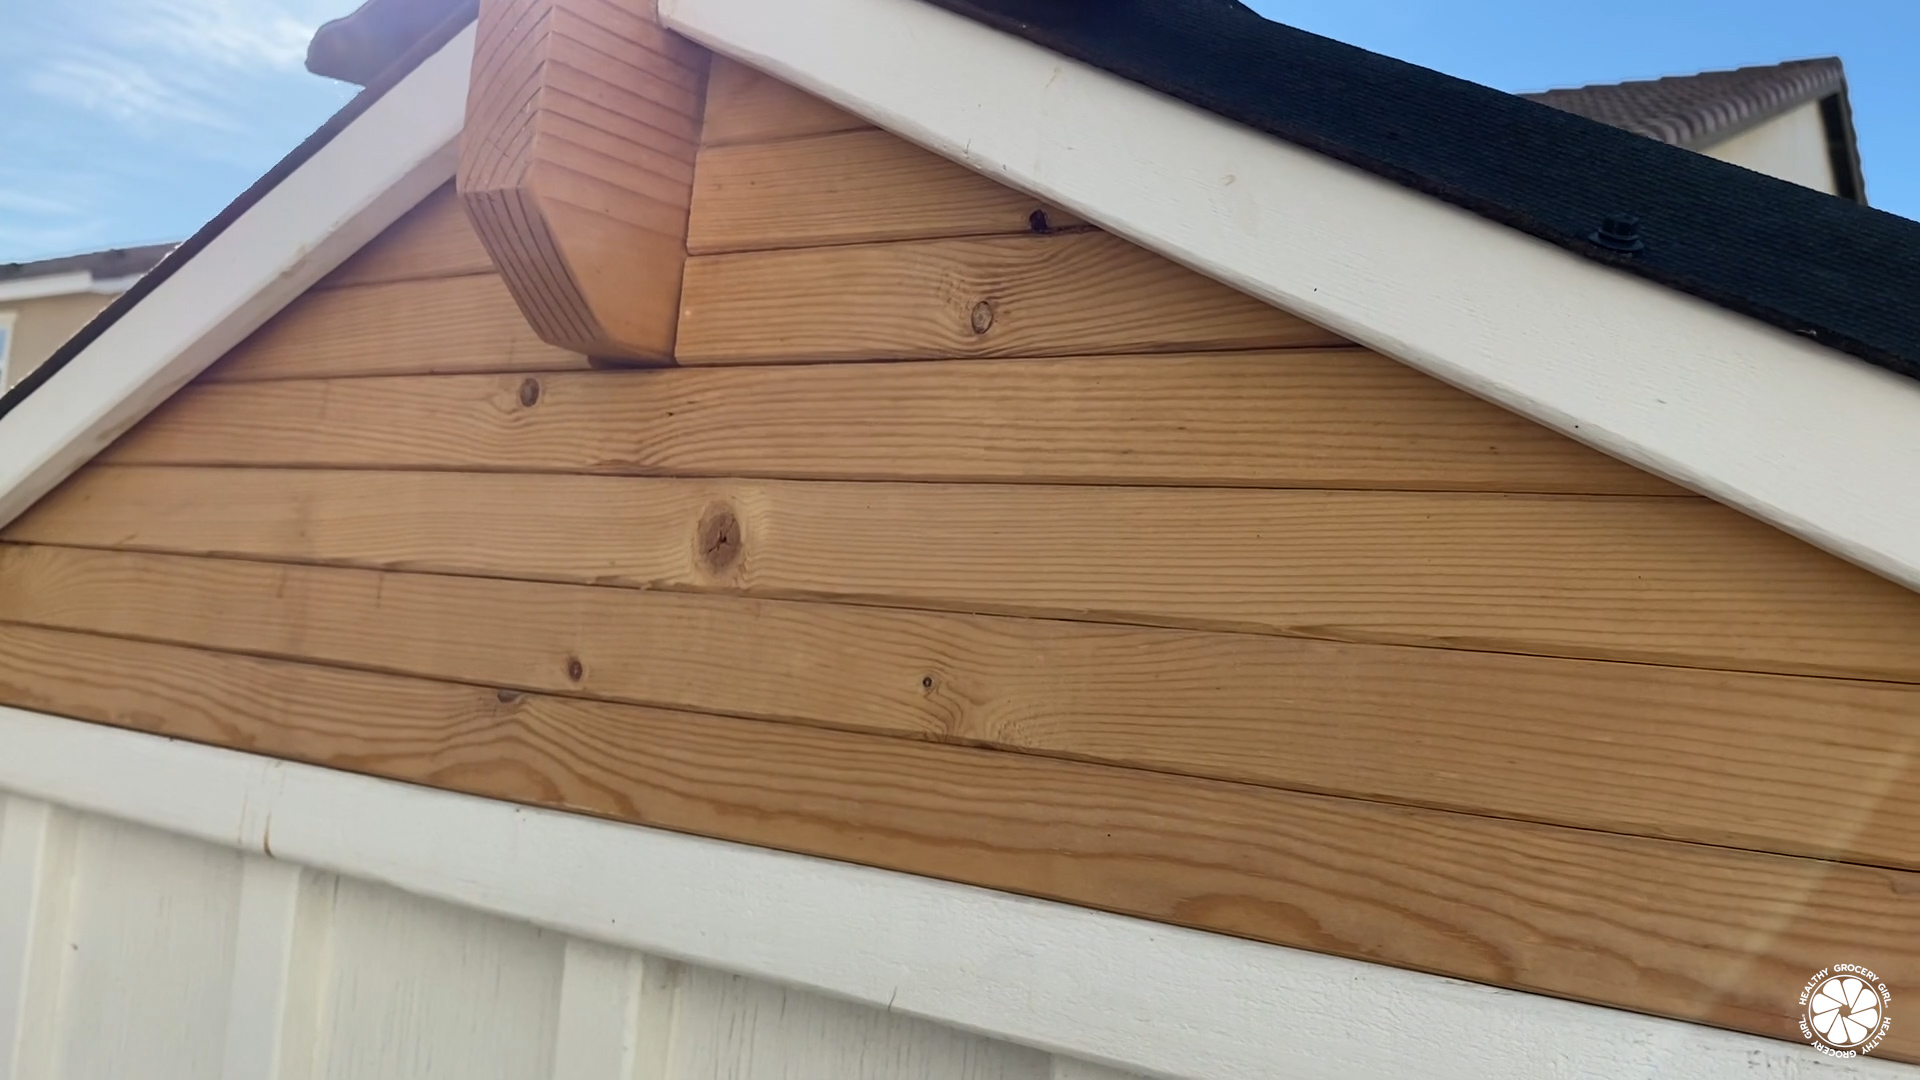
For the roof, as I said before, I changed my design from a flat slanted roof to a peaked roof and wanted some sort of cool look in the peak. So I used scrap cardboard to draw up what I was thinking and determine how many and what length of wood I needed to cut. I used basic 2×2 lumber for this. I cut them, and screwed everything together. As you can see I also decided to have my 2×6 roof beam sit in the side walls of the roof, so I made space for that. Once I was happy with the side walls, I cut off the excess to give me my triangles, attached the beam and installed it on the house.

Completing The Look: Coastal Farmhouse Playhouse
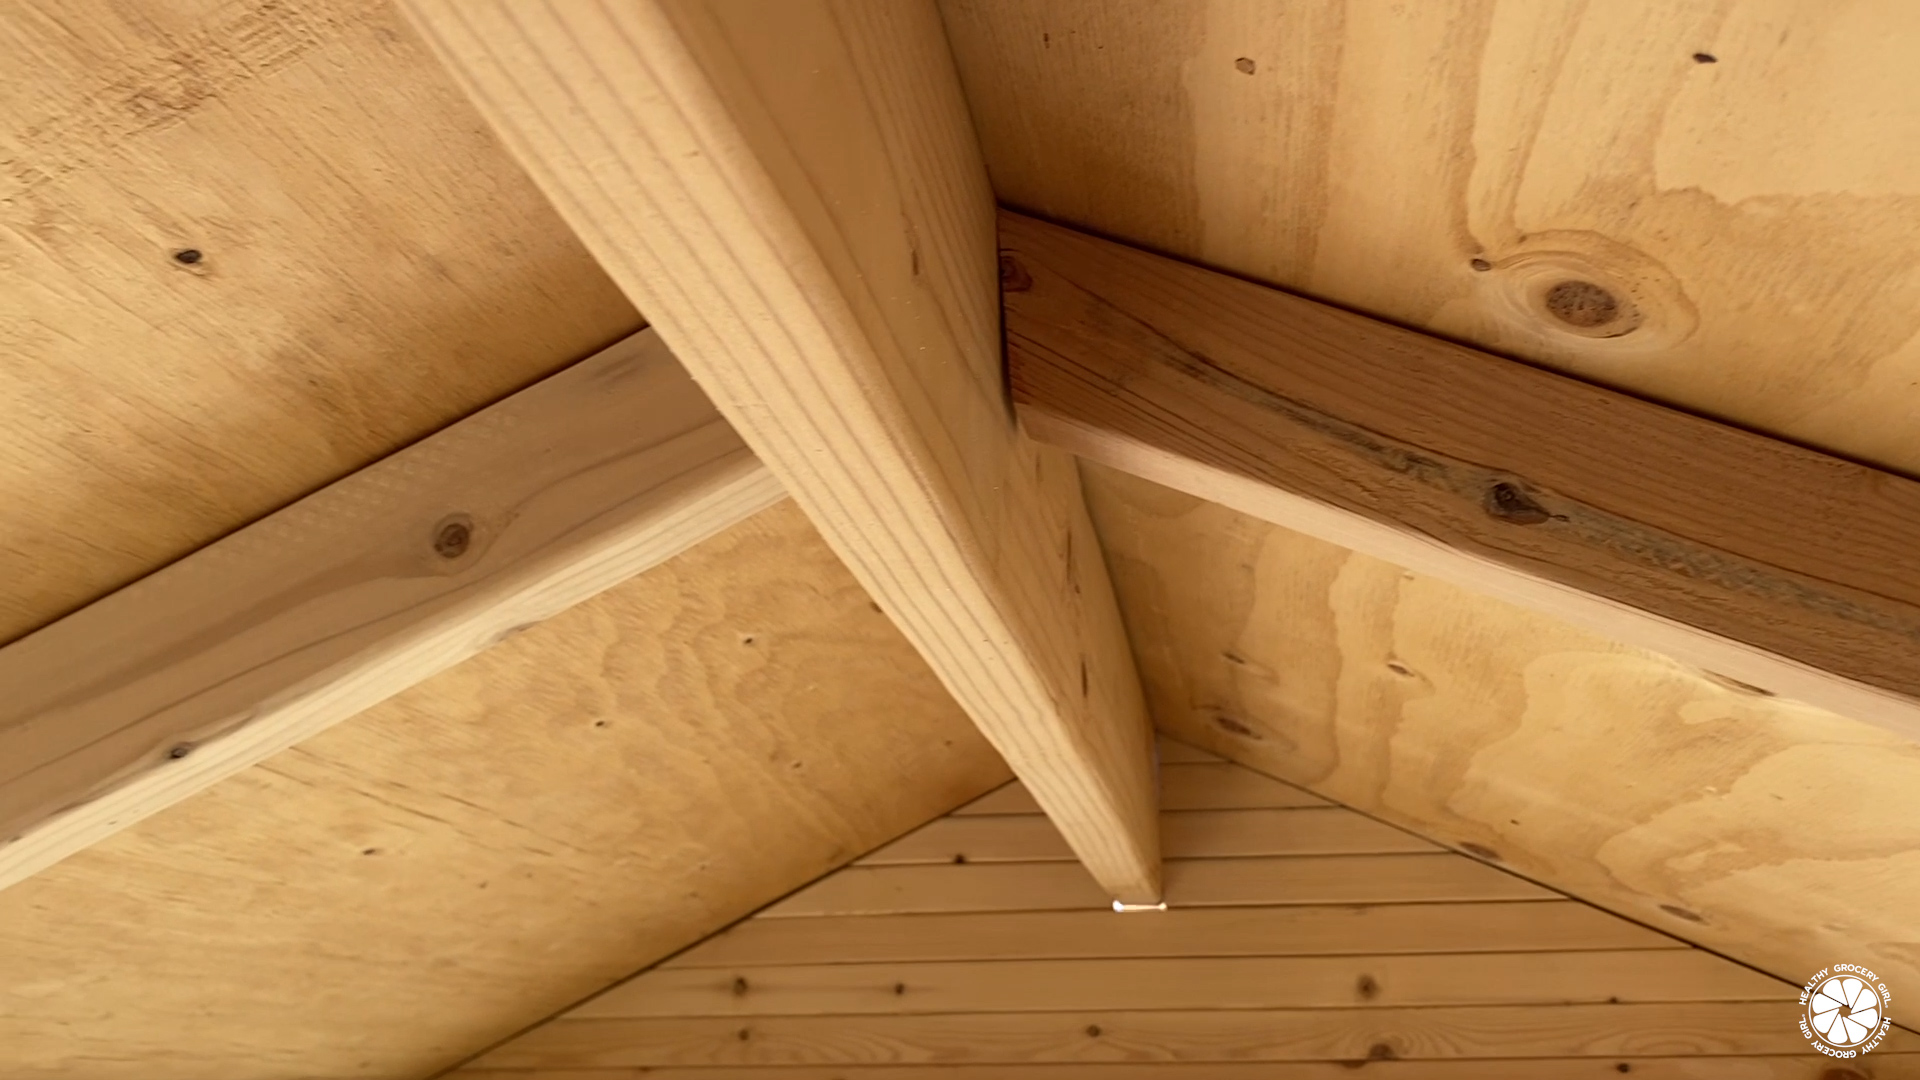
Caulk and paint… and a lot of both, are key to minimizing the look of mistakes and make the house look much more professional. We love the black and white look, so I finished the house off with a basic white exterior paint. To complete the roof, I added ¼ inch plywood sheets and built a little cantilever awning. I also added a border around the roof out of 1×2’s to support and continue the edge of the awning. You can see I painted the plywood black even though I put roofing over the top of it. I did this, because I had a one month delay between finishing the playhouse and getting the roofing material. On the inside of the playhouse, I added supports in the center of the roof from the walls to the beam.
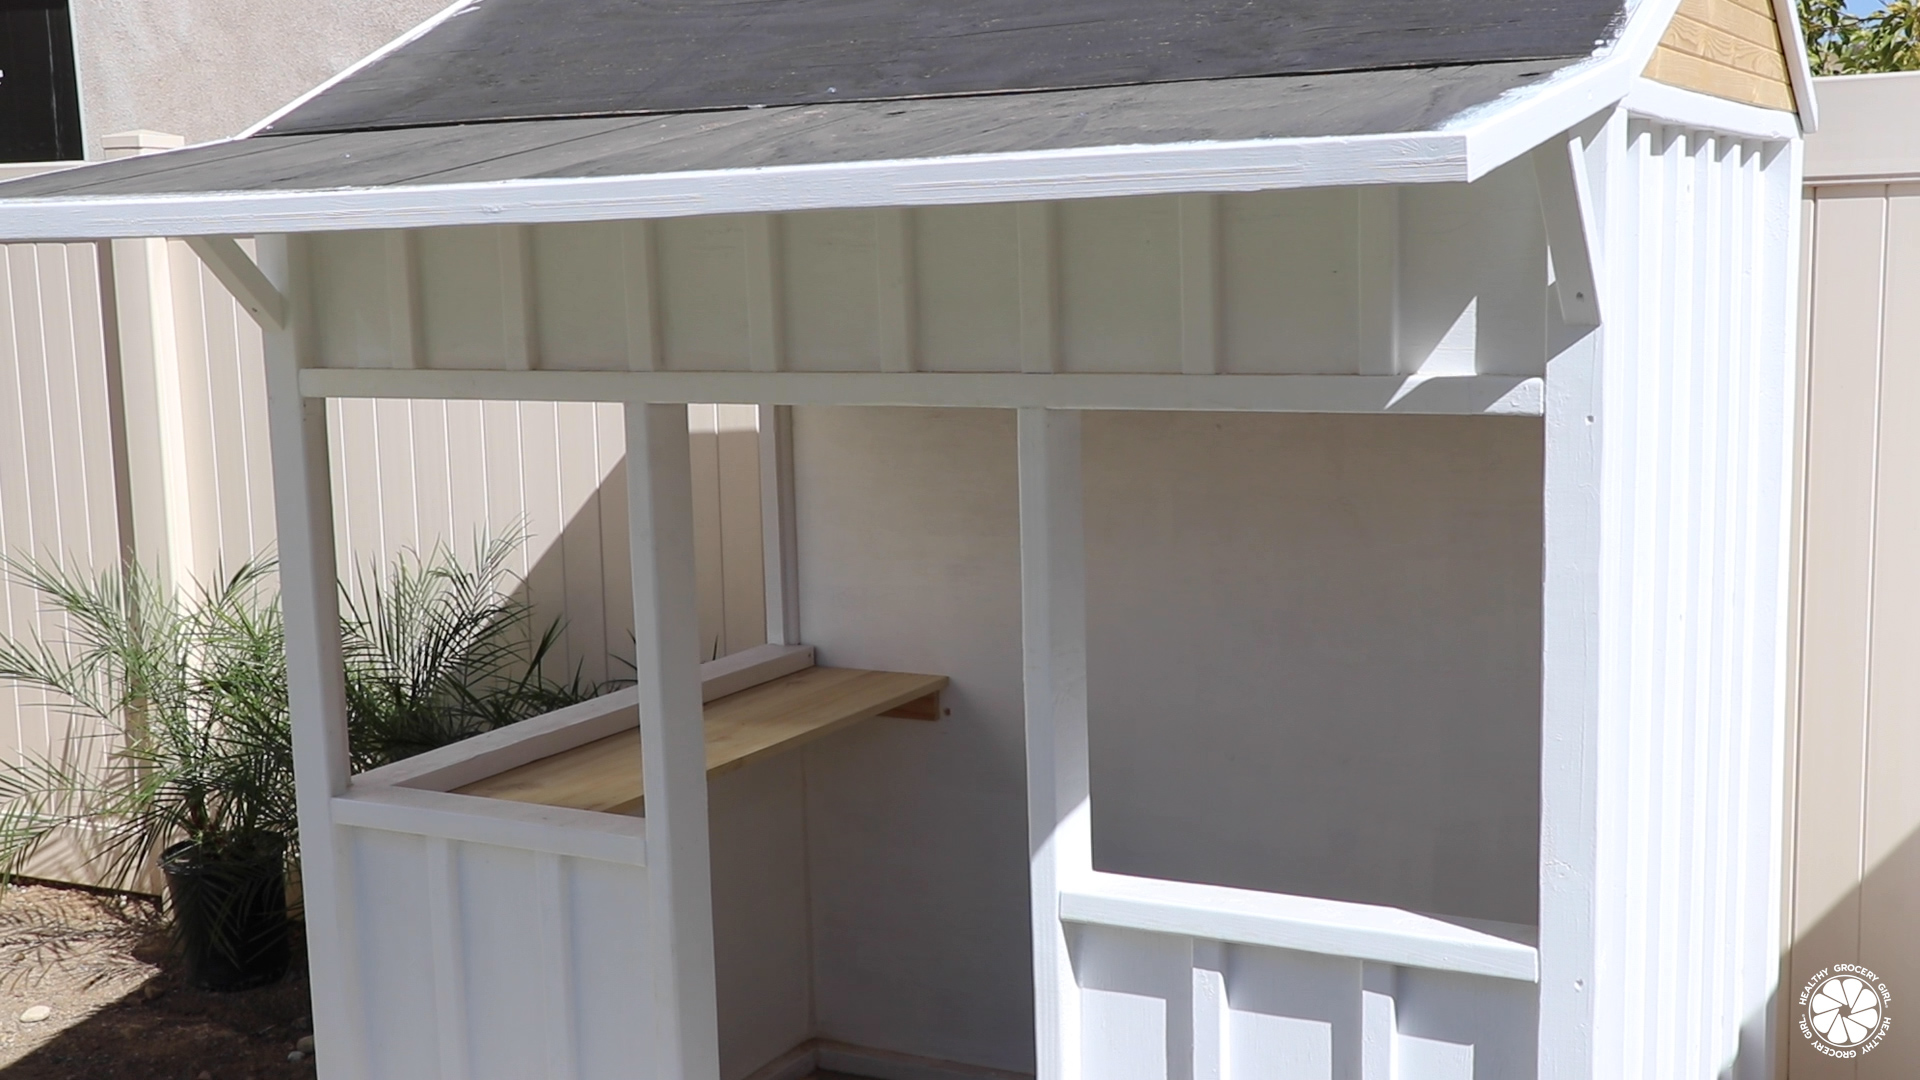
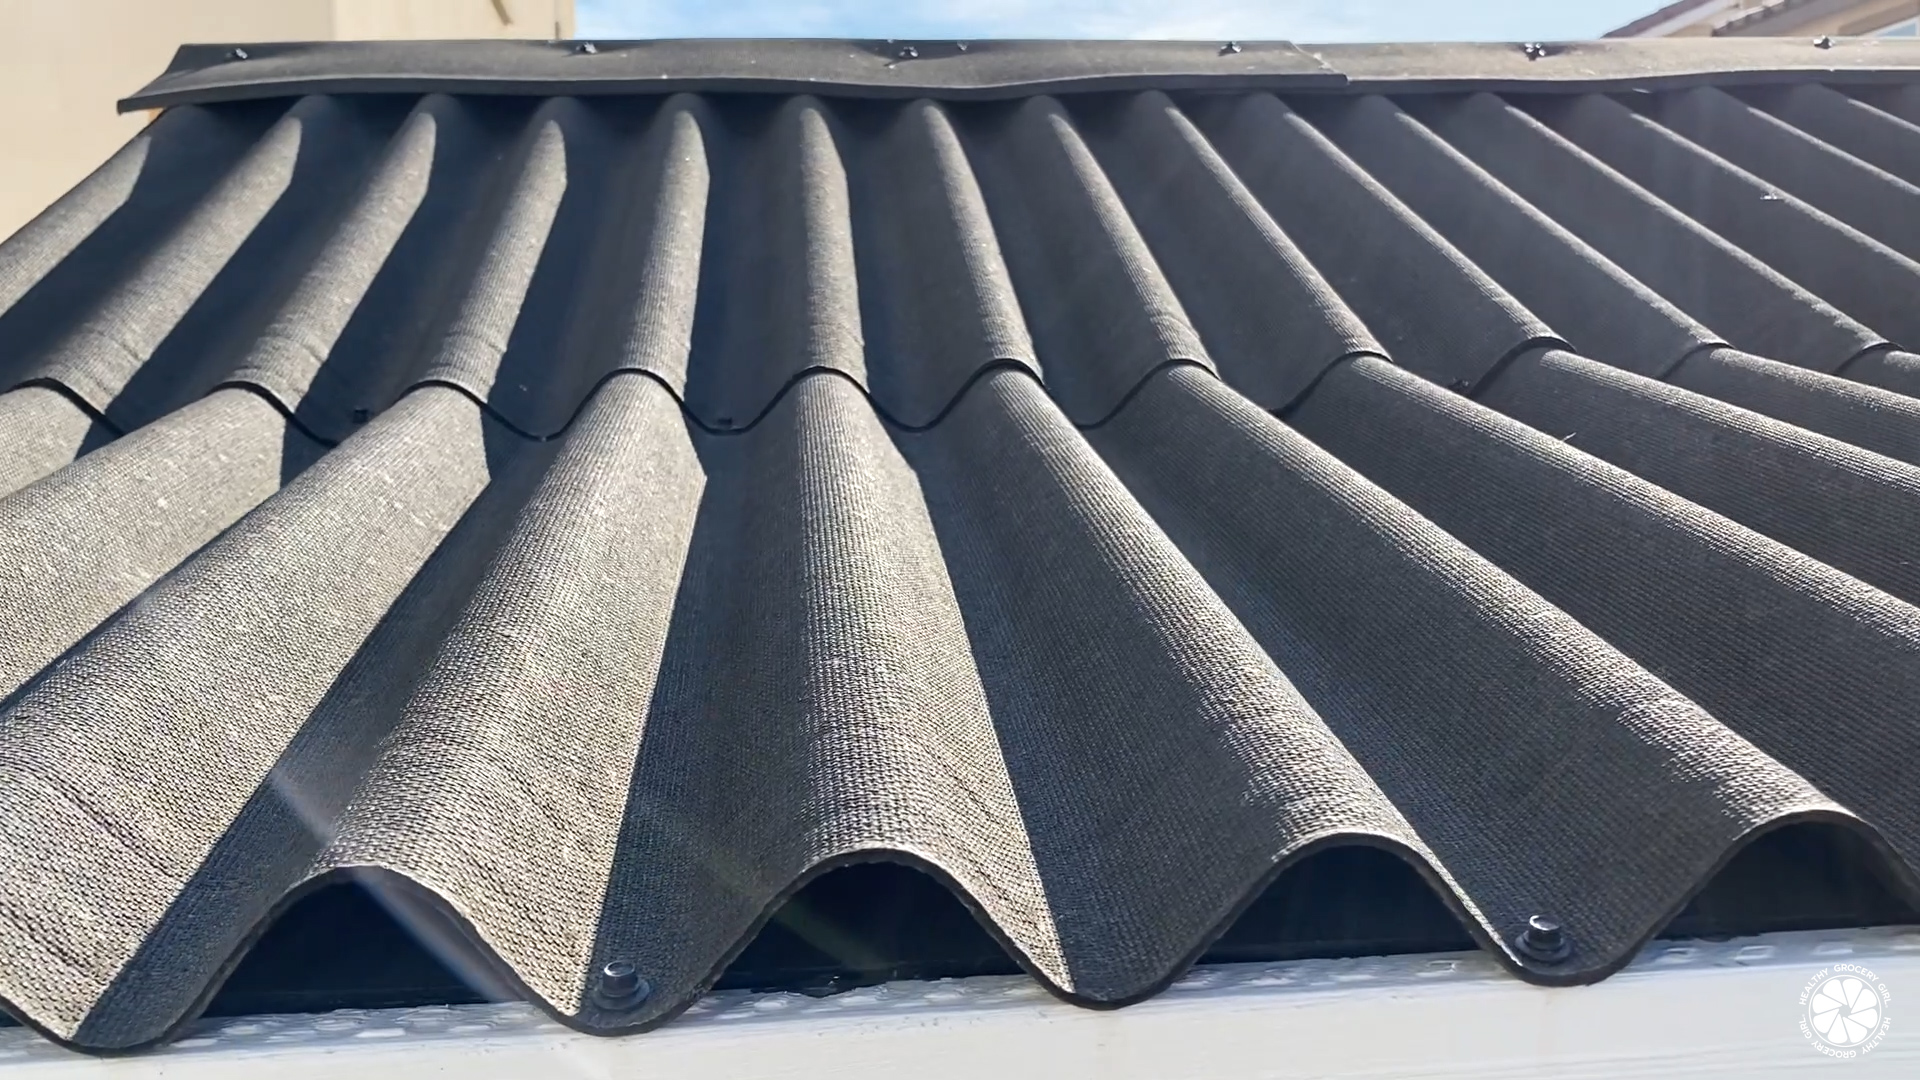
I wanted a black corrugated metal roof, but I could not find any for a reasonable price. So I got this product called Ondura Corrugated Black Asphalt Roof Panel. It is asphalt roofing material in a corrugated design, easier to handle than metal and a really good price. Not exactly easy to cut, but once I got a system down and all cut, I was able to install it pretty quick.
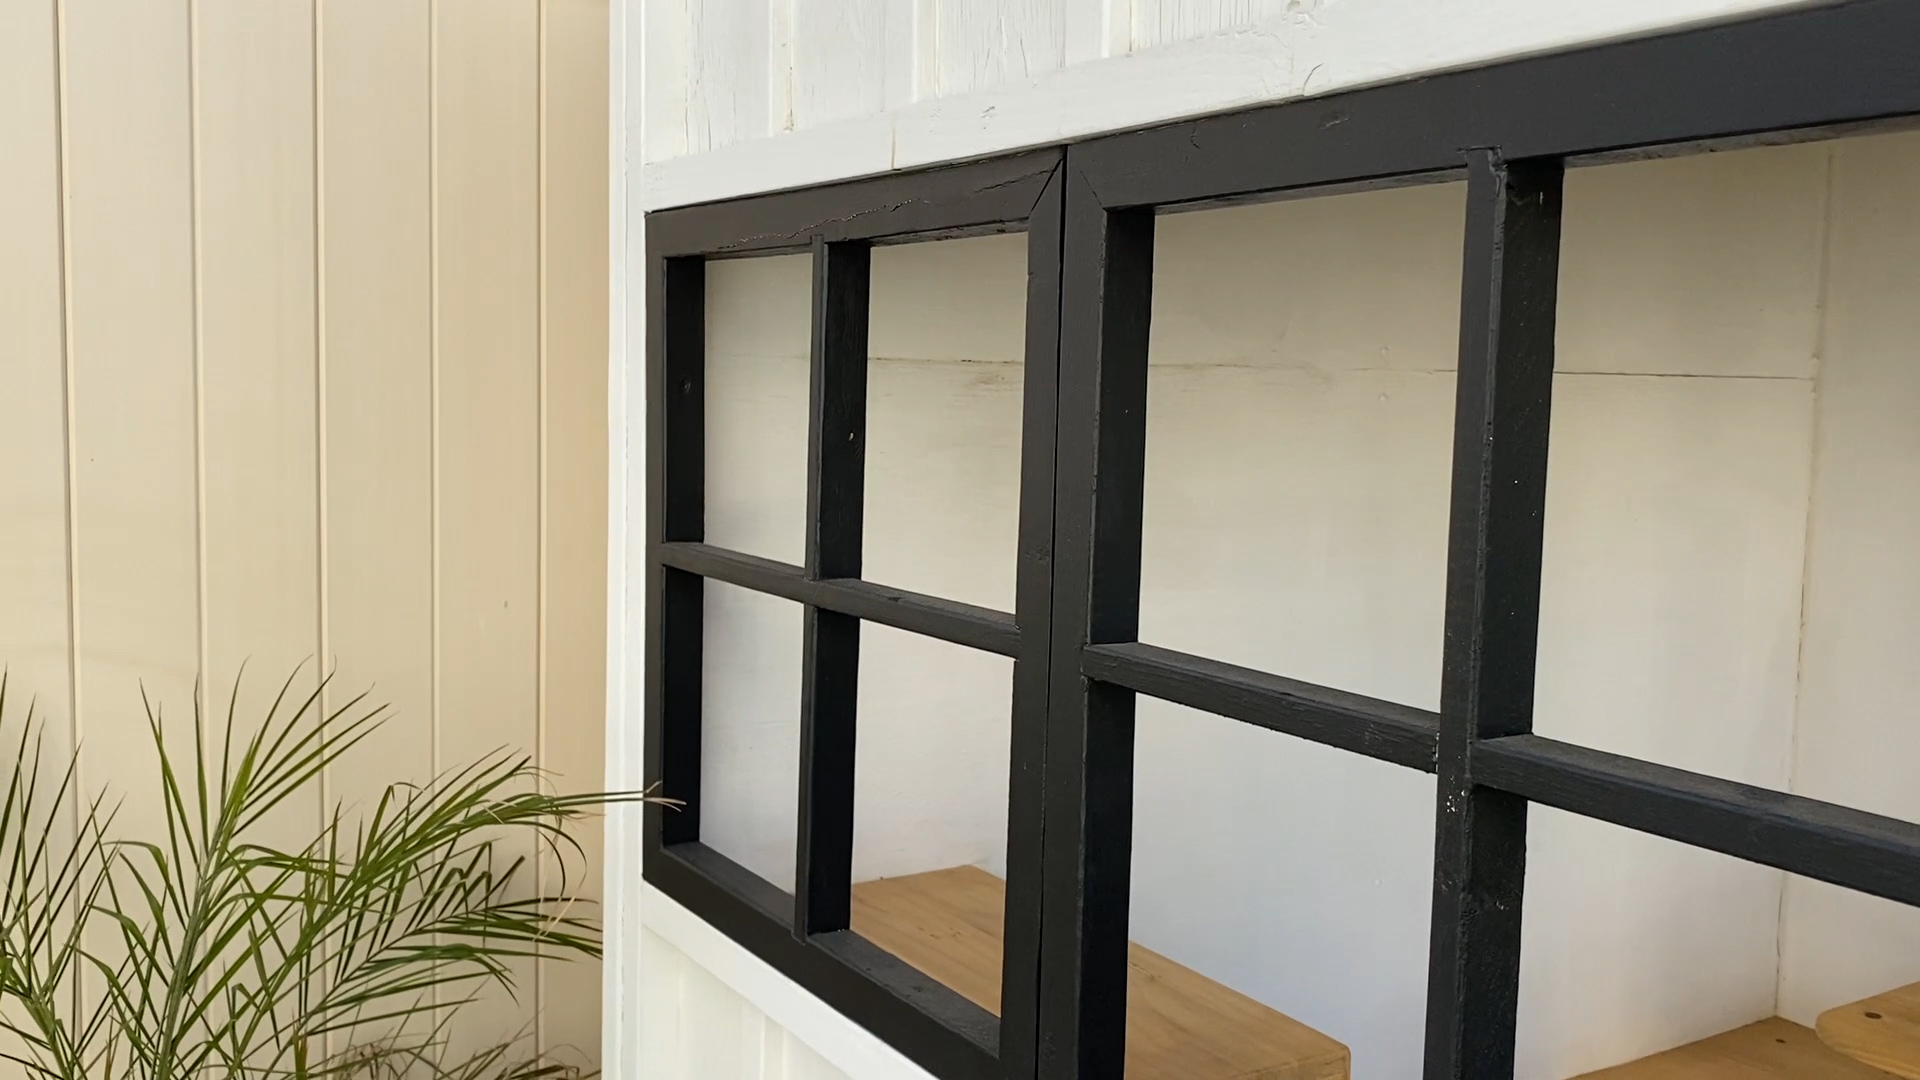
Simple DIY Playhouse Windows
The final step for the outside of the playhouse was the windows. I made squares out of 2×2’s and crossed the inside with 1×2’s then painted them black. Because of the imperfection in my framing, I measured carefully and built each window with slight dimension differences so that they fit as tight as possible without too big of gaps. The windows are currently screwed into place; but designed so that in the future I could hinge them and allow the kids to open and close them.
We have also built out the inside, added a sandbox and started on the landscaping around the Playhouse! When all of that is complete we will do another post and video sharing a tour!
Materials
Because I design as I go, and I took a few months to complete this project. It is hard to know the exact quantity of lumber I used, especially when it comes to the 1×2 and 2×2. But I tried to count, and think what I have below is pretty close.
Supply List:
- (6) 2x4x10ft
- (1) 2x6x8ft
- (12-14) 2x2x8ft
- (10-12) 1x2x8ft
- (8) 2x3x8ft
- (5) 4×8 Plywood ⅜ inch
- Corrugated Roofing (3)
- Roofing Caps (2)
- Outdoor Screws 3inch
- Wood Glue
- Drill / Driver
- Miter Saw
- Oscillating Saw
- 4” Paint Roller
- 6” Paint Roller
- Foam Rollers
- Paint Tray
- Spackle Kit
- Latex Caulk
- Sanding Sponge
- ECOS Paints
I hope you enjoyed this post, and found it somewhat helpful. If you have any questions, please post them in the comments section under the video here and I will try my best to answer anything I can about this Playhouse Build! Thanks for following along on my latest DIY project and wishing you the best on your next DIY too!
You can also follow us on Instagram @HealthyGroceryGirl and if you make a playhouse inspired by this one, we would love to see! Tag us at @HealthyGroceryGirl